A Tax Pro’s Complete Guide To Bulk Filing Form 941 with TaxBandits
reading time: 15 minute(s)

There is a new 941 deadline on the way, and we are breaking down the 941 e-filing process with TaxBandits.
Here is a complete overview of how to file Form 941 for Q2 2023 for your clients using your TaxBandits account!
Just follow our step-by-step 941 instructions to ensure you meet your clients’ filing 941 deadline on July 31st.
Getting Started in Your TaxBandits Account
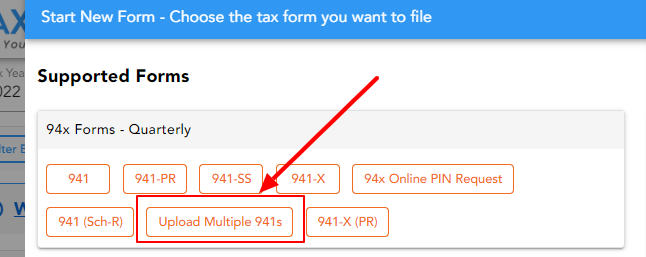
Once you’ve signed in to TaxBandits, select ‘Start New’ in the upper right corner:

Select ‘Form’

Select ‘Upload Multiple 941s’
Bulk Uploading Form 941 Information
Your first step is downloading the Bulk Upload Template. The first tab of the spreadsheet contains all of the instructions you may need to complete the template. There are other tabs where you can enter Form 941 and Schedule B information as needed.
The most important thing to keep in mind is that you should not edit the layout of the template as this is used to map the forms.

Once the template is complete, you can drag and drop the file (xls or xlsx format) and click the orange ‘Upload’ button.

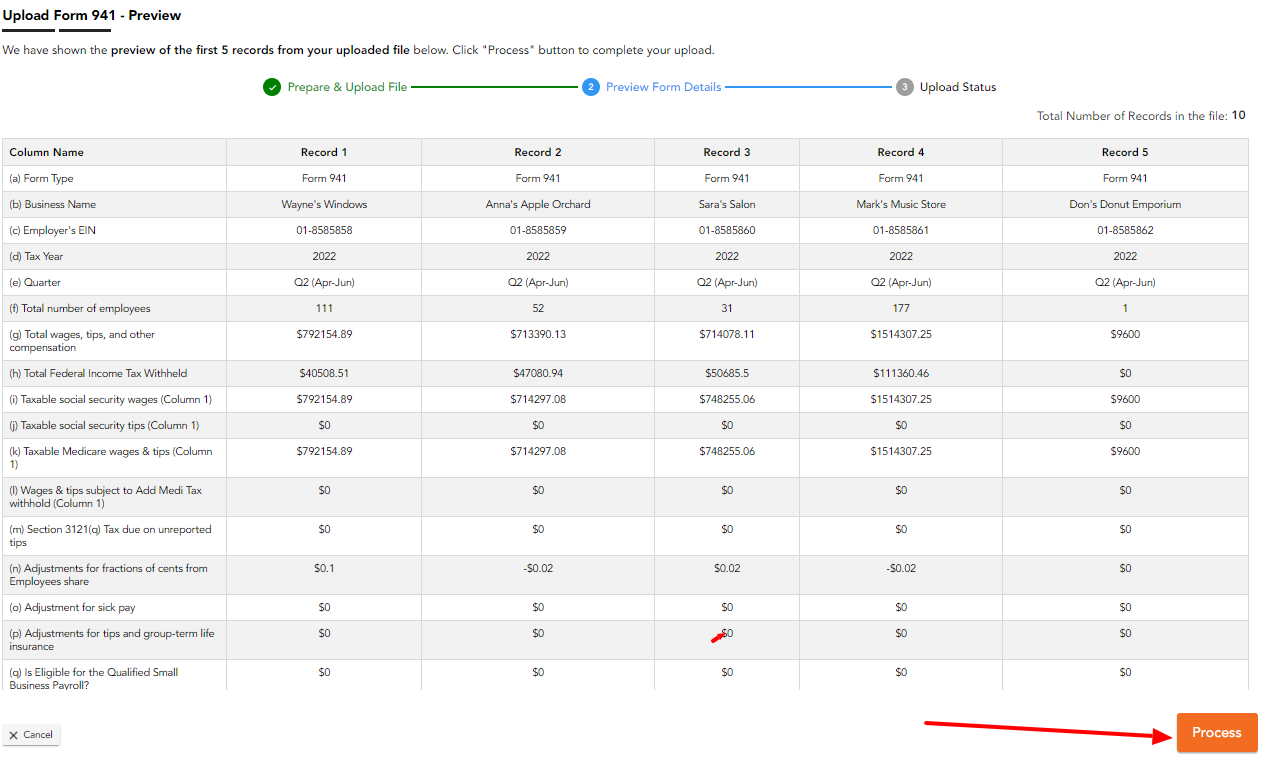
TaxBandits will show you a sample of the first 5 records in the file. If the information appears to be mapped correctly, click ‘Process’ to continue.
TaxBandits will process the file and provide its status. If there are any records with errors, they will appear here. If you want to fix these errors now, you can edit and re-upload the template. If you want to proceed with filing all of the records that are successful, you can do this and come back and correct the errors later. When you are ready to proceed with filing click ‘Continue Filing’.

TaxBandits will now display all the generated 941 forms based on the information you uploaded. You can click the checkbox beside each of the forms before proceeding so that TaxBandits will audit them. You can click the eye icon to view a summary of the form and you can click the pencil icon to open the form and edit it directly.
If you want to remove any of the forms from this batch, you can click the trash can icon to delete them. When you are ready to proceed to the audit process, click ‘Audit Selected Returns’.

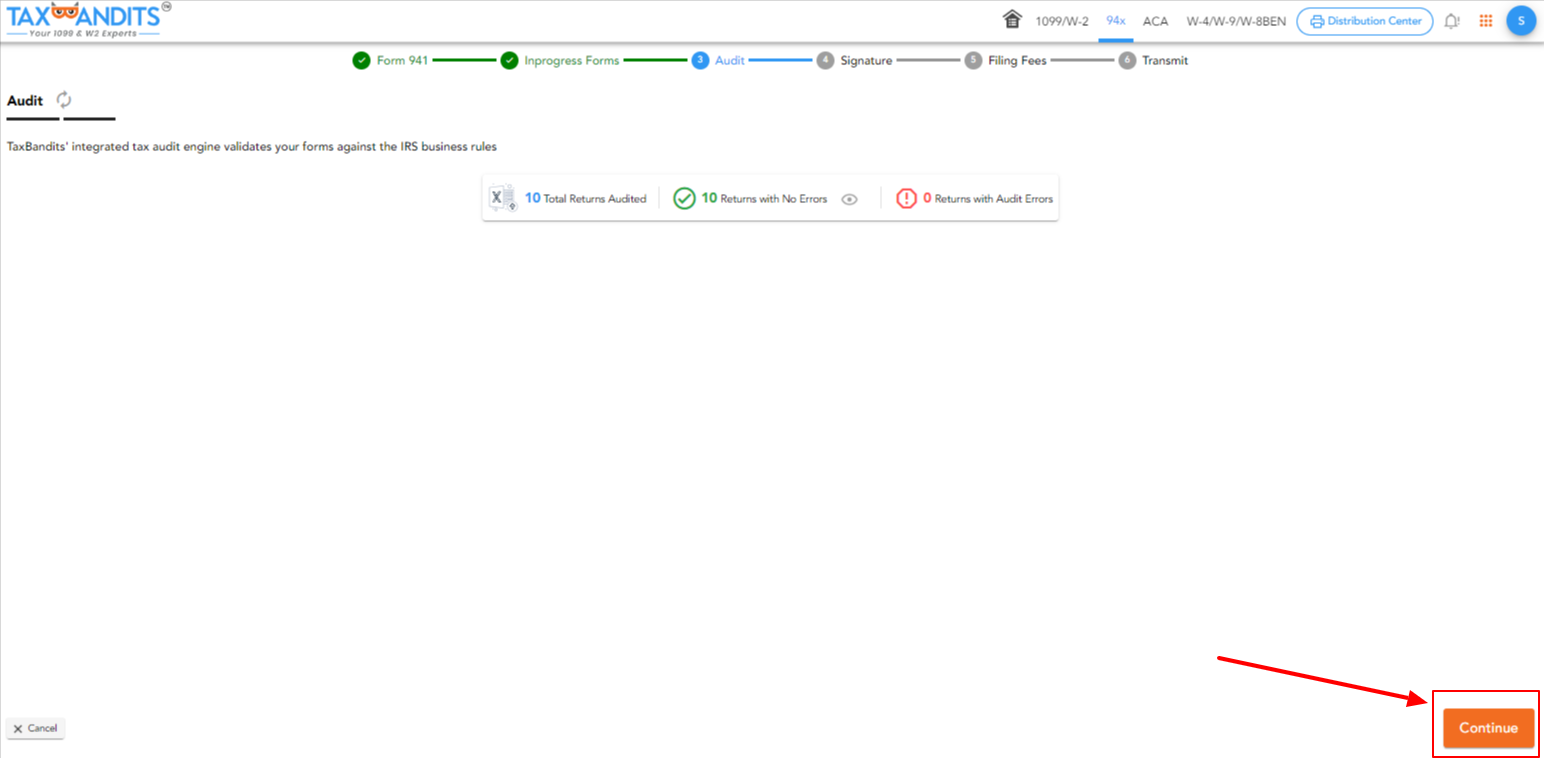
TaxBandits will perform an audit on the forms using the IRS Business Rules and show the results on the next page. You can address the errors as needed. When you are ready to proceed, click ‘Continue’.
Requesting Your Client’s E-signature
Now that the forms are generated and audited, you can collect your client’s e-signatures. Click the blue ‘Signing Options’ button to the right of each return. When you’ve collected all of the required e-signatures, you can click the orange ‘E-file Selected Returns’ button to continue.

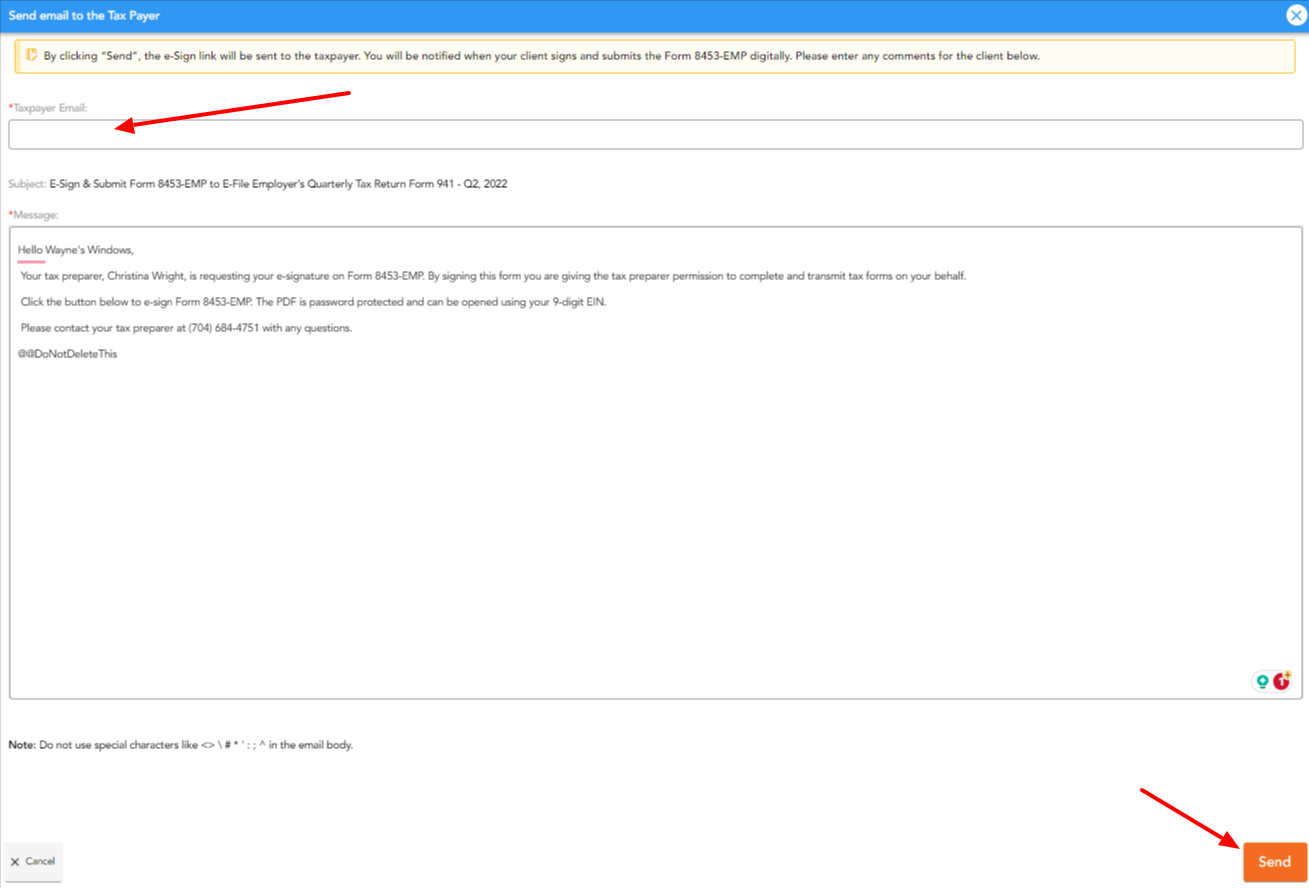
When it comes to collecting your client’s signature, you have two options. The first option is to send your client an electronic request to e-sign Form 8453-EMP. Click the orange button, ‘Send E-Sign Request’.
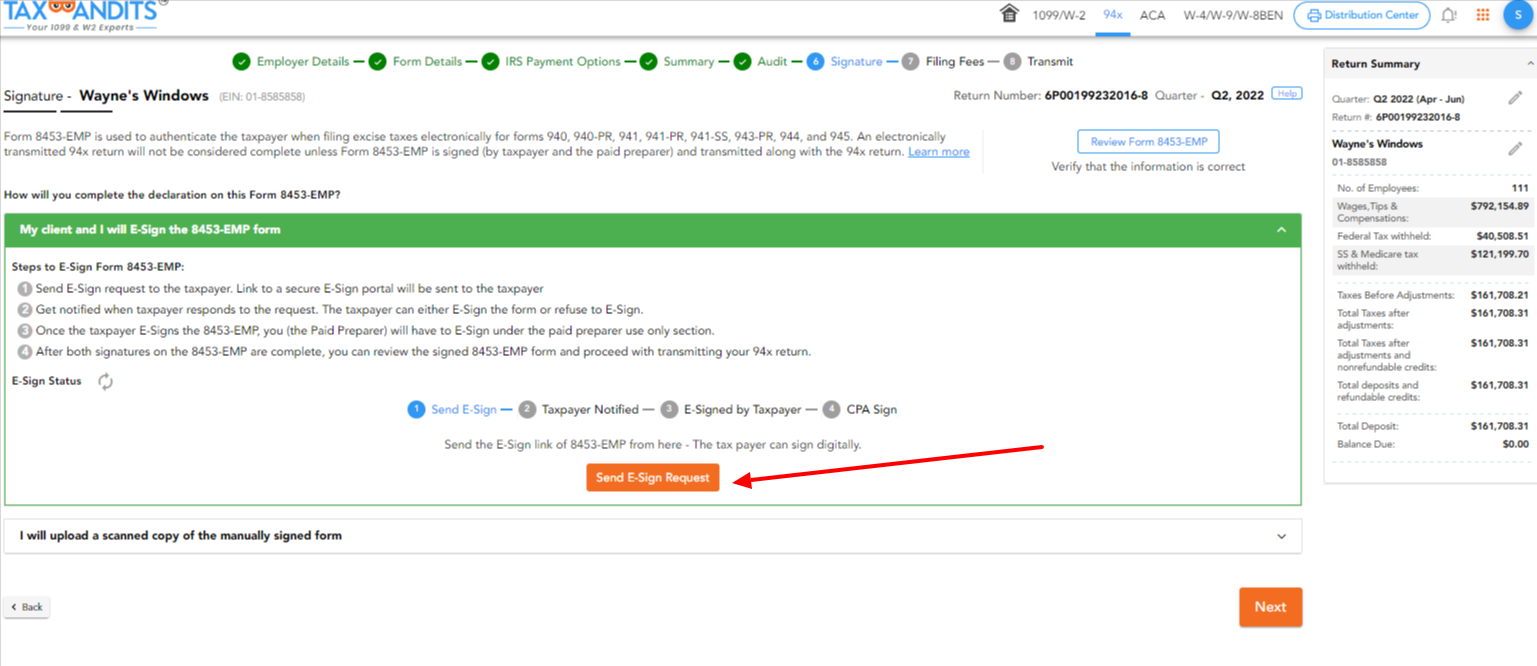
To send the request successfully, you will need to enter your client’s email address. You can edit the body of the email if desired. Then click ‘Send’ to email the request to your client.
Collecting Your Clients’ E-Signature
If you are filing with a PTIN Your Clients Provide Their E-Signature on Form 8453-EMP. If you are filing as an ERO, your clients provide using 8879-EMP. You can request these forms through Taxbandits via email. Once the email is sent, your client will receive this email from TaxBandits. They can click the button to e-sign the form. They will be prompted to reach you with any questions.
While the example below shows the process of e-signing Form 8453-EMP, the process will be the same regardless of the form you request from them.
*If you’re a Reporting Agent, simply enter your RA PIN and continue filing.


To ensure security, your client will need to provide their EIN to access and E-sign Form 8453-EMP.
Once the correct EIN is entered, the client will be prompted to e-sign the form.

Your client will click the button to e-sign and they can either type their signature or use the stylus option. When they are happy with the signature, they must check the box certifying that this is an electronic representation of their signature. Then they can click ‘Adopt & Sign’.
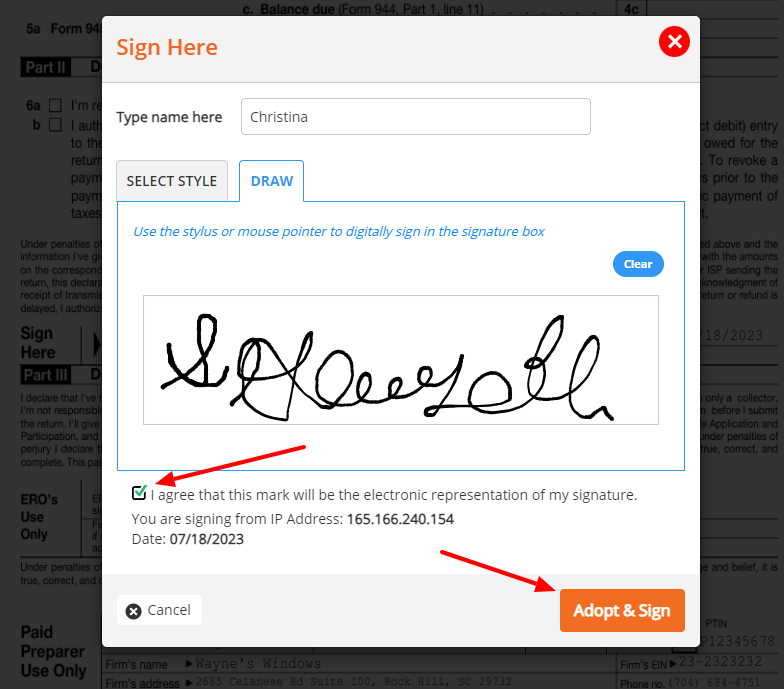
Your client should then click the button to submit Form 8453-EMP.

Continue to E-file Forms 941
Once you have your client’s e-signatures, you can proceed to e-filing the forms with the IRS.


You can view the forms that are ‘Ready to E-File’ by navigating to your 94x Dashboard. Click the ‘E-File Selected Forms’ button to proceed.
Form 941 Filing Fee and Transmission
TaxBandits will show you an overview of the Form 941 filing fees. Click ‘Continue’ to proceed.

On the Transmit Page, you have the option to review each form before clicking the green ‘Complete Filing’ button.

When it comes to making the payment, you can choose an existing credit card, add a new card, or apply prepaid credits. To transmit the forms, click the green ‘Pay and Transmit’ button.

After you click the button to transmit the forms, you will be brought to the confirmation page.
Any next steps that are required for you will be included here. Once there is an update from the IRS on the status of your forms, we will notify you by email and through your 94x Dashboard.
…And just like that, you’ve filed your clients’ 941 forms! Ready to get started?
Click here to sign in if you already have a TaxBandits account.
No account? No Problem! Click here to sign up for a free account. You can take advantage of bulk uploads and all of the other specialized features in your tax professional account for no additional cost, just pay for what you file.

Leave a Comment